Changing Your DNS Settings on Windows 10
If you’ve never changed your DNS address, you’re probably still using the one given to you by your ISP. It’s really easy to change the DNS server and by doing so, you can enhance the privacy and security (and speed, to some extent) of your device.
A DNS is a string of numbers that you’ll need to enter in your device so it can connect to the internet. For example, Google DNS address is 8.8.8.8 and 8.8.4.4. It’s very popular and is easy to remember.
Changing your DNS settings is a simple process. However, before you change it, save the current DNS settings so if something doesn’t work, you can easily switch back to the old numbers.
There are several public DNS servers that you can use such as OpenDNS, OpenNIC, Comodo Secure DNS, and Google Public DNS.
How to change the DNS settings on your Windows 10 PC
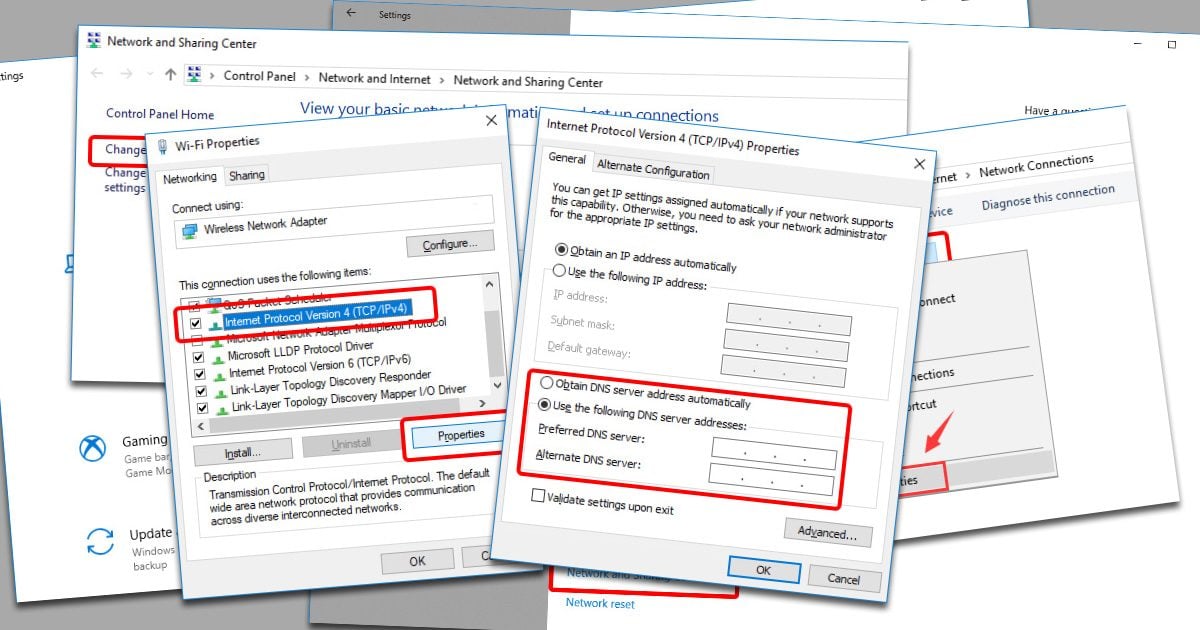
- Go to the Control Panel
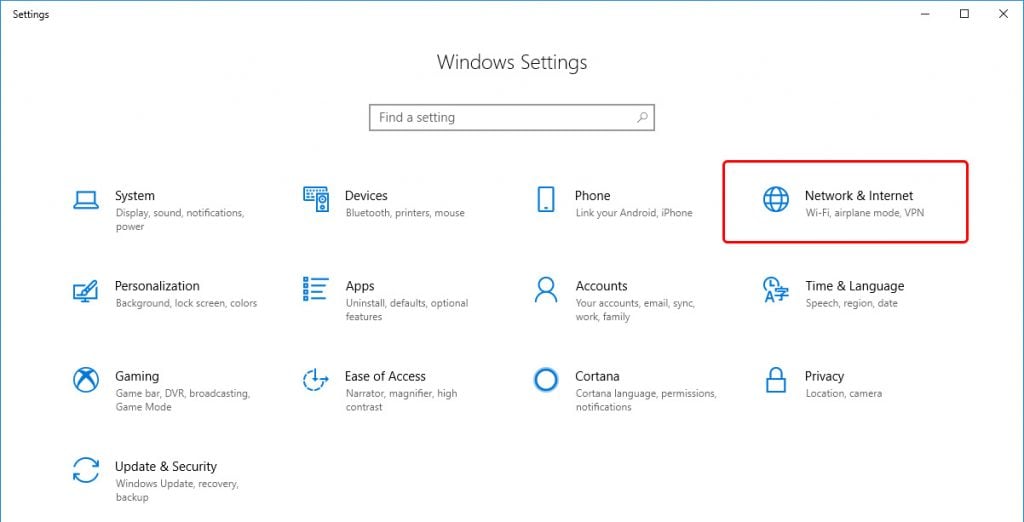
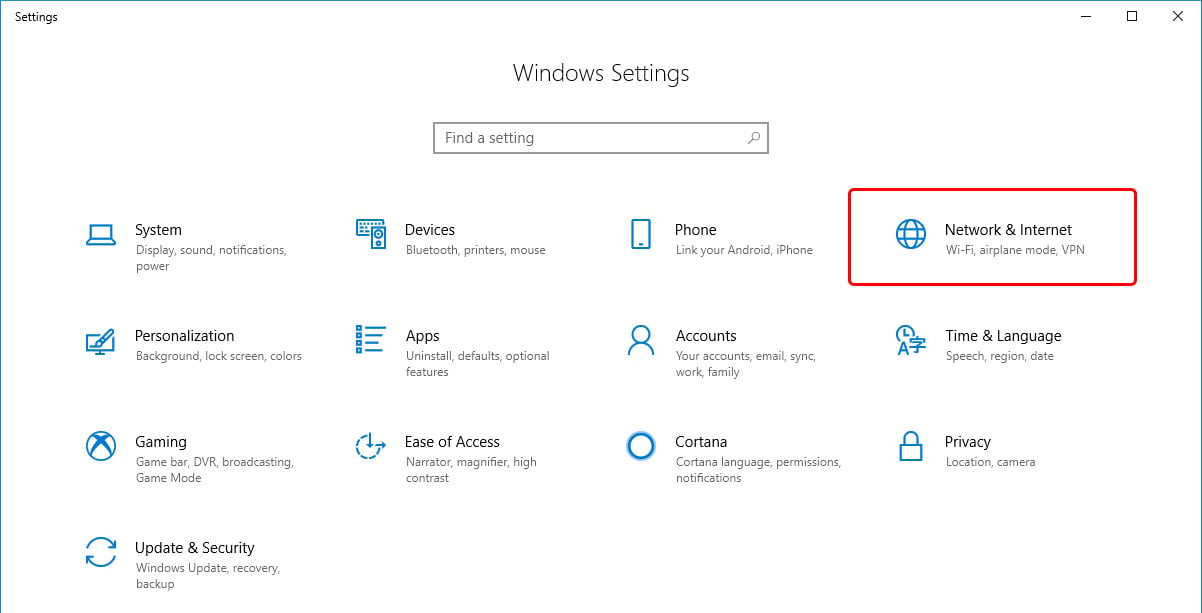
- Click on Network and Internet
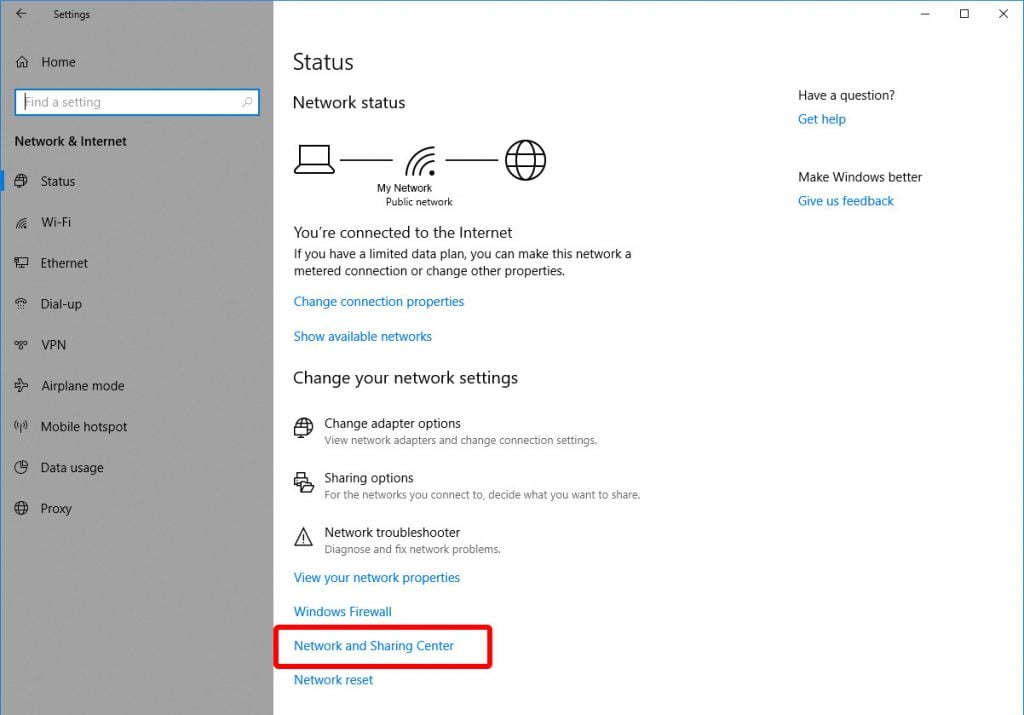
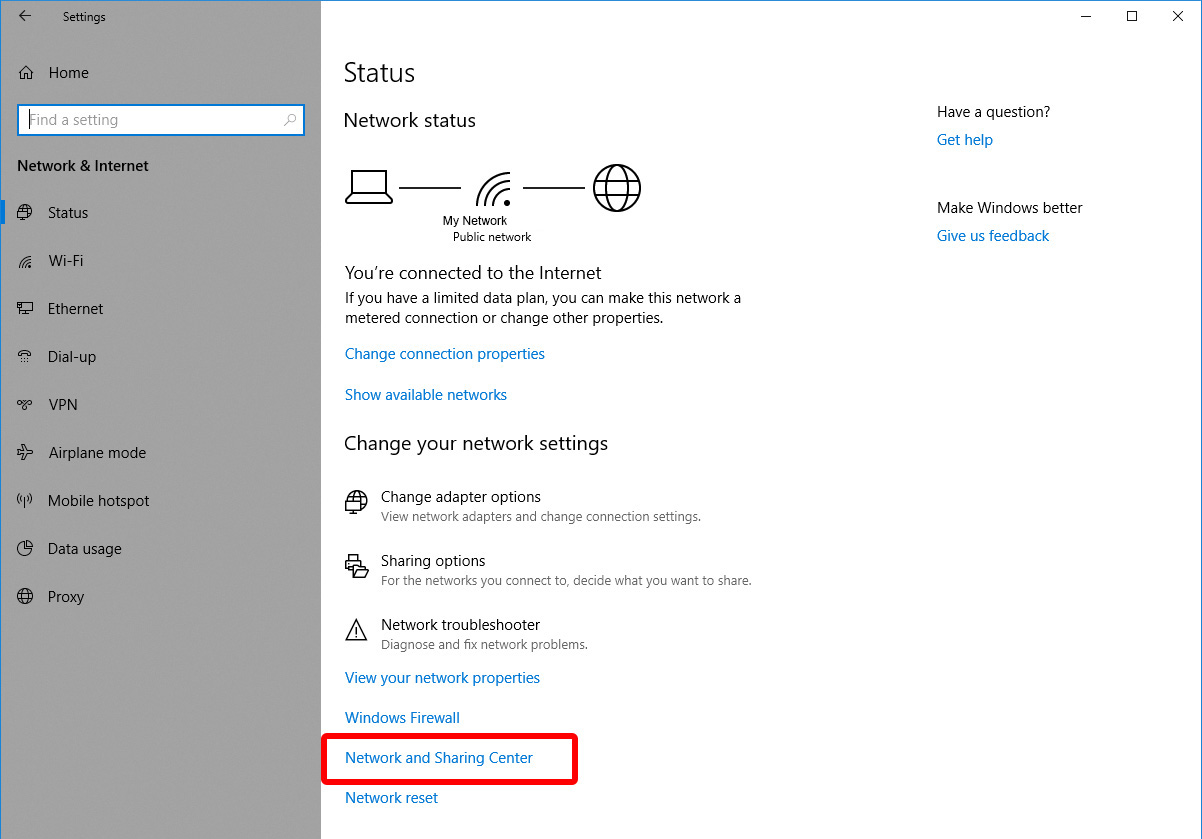
- Click on Network and Sharing Center
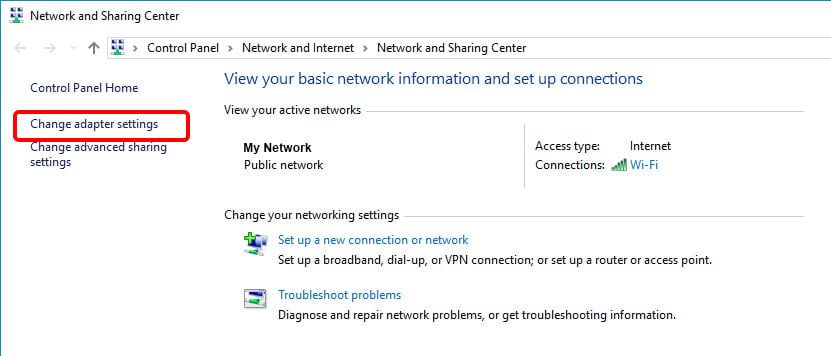
- Go to Change Adapter Settings.
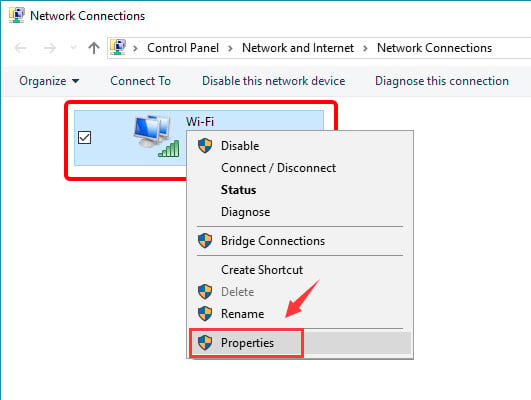
- You’ll see some network icons here. Select the network you’re currently connected to and right click on it. Select Properties.
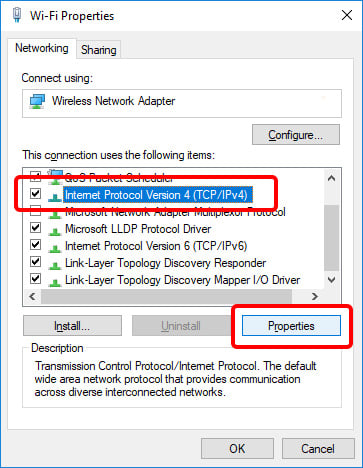
- Click on IPv4 and select Properties.
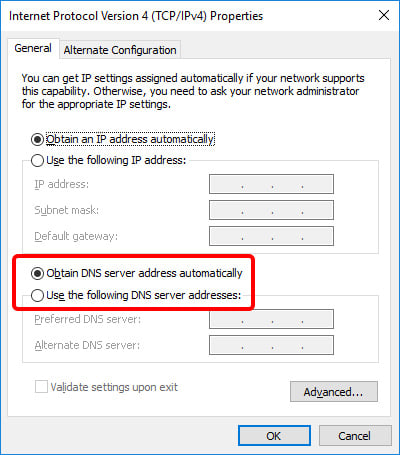
- If “Obtain DNS server address automatically” is selected, click the radio button next to “Use the following DNS server addresses:”
- Now enter the DNS addresses you want to use.
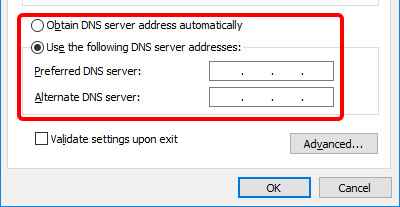
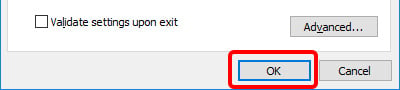
- Click on Ok and Close.
Your DNS settings are now changed on your Windows 10 PC.
